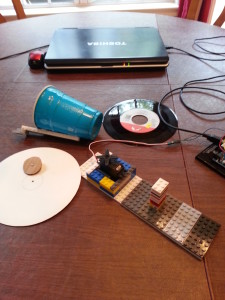
I recently ran across an Instructable where the author showed how he had created a record player from paper. I thought that was pretty cool and decided to make something similar for myself. But rather than using paper and turning the record by hand I wanted to use one of my handy, dandy servos and my Arduino. For the base and housing for the servo the obvious choice was Legos.
I first considered drilling holes into a flat Lego piece and using nuts and bolts to fasten the servo to the Lego. After rummaging through my collection of nuts and bolts I found that I did not have any that would work for that purpose. (Mental Note: buy some nuts and bolts.) So instead I simply built Legos around the servo and then tightened it by wedging a small piece of cardboard in there.
In order to make the turntable more stable I used my record to draw a circle on the bottom of a paper plate. Then I cut the platter out of the plate with scissors. So the record would not slide around I cut a circle of cardboard to fit the center hole in the record. Then I used a screw that came with the servo to attach the platter to the servo.
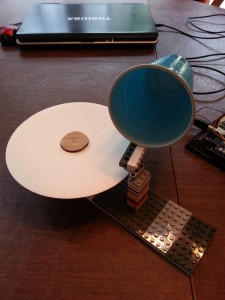
Thinking back to when we used to have a record player (a long, long, long time ago) I remembered that the arm with the needle needed to have freedom to move horizontally as the record turns and the needle follows the groove. Luckily I found a Lego piece that would work for that. I then extended the arm to be long enough to reach the record. For the horn, or makeshift speaker, I first tried a paper Dixie coffee cup. I did not have an actual needle but I was able to find a straight pin so I used that. I stuck the needle through the bottom of the cup near the edge and pushed it through the edge. I felt that the tighter the pin was in the cup, the better it would reproduce the vibrations in the grooves of the record. I attached the cup to the Lego arm with rubber bands.
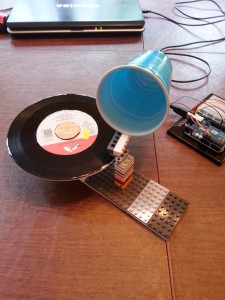
I had earlier checked the rotation speed of the servo motor but checked again once I had everything set up. The speed came out to be 44 rpm, very close to the 45 rpm the the record requires. I set the speed and rotation in a very simple Arduino sketch (code below). Since everything seemed to be a go, I placed the needle on the record and let it fly. The result was mildly depressing. Even with the platter the record was a little wobbly so the needle would touch the record for half of the revolution and then lift off the record for the next half.
To fix that problem I simply applied a little pressure on the top of the cup with my finger. That worked a little better but still not very well. Okay, maybe the needle wasn’t sharp enough to get down into the groove as it should. So I decided to rework the horn entirely by sharpening the needle (pin) and replacing the paper cup with a plastic one.
When I tried to attach the plastic cup to the arm with the rubber bands I found that it was too slippery and the bands would not hold. I then used some transparent tape to attach the cup and it worked perfectly. Unfortunately, that was the only perfect thing about the whole thing. Once I tried it again I found that the sound, while better, was still not very good. It was necessary for me to move the needle around some while pressing on the cup in order to get a sound that was recognizable as music and lyrics. Another factor in the low quality sound results was the volume of the servo motor itself. I think that if it were quieter or if I used a quieter hobby motor then the results would have been better.
All said and done, the project was easy and fun with audible results. I’m sure that it is possible to get better sound out of this player, perhaps using a better and sharper needle, experimenting with the horn itself, and as mentioned earlier, using a quieter motor. Who knows, that might be a project for another rainy day 🙂
// MakerDaddy.com – Turn servo clockwise at full speed.
#include
Servo motor1;
int motor1Speed = 180; // Full speed
void setup(){
motor1.attach(9);
}
void loop(){
motor1.write(motor1Speed);
}


